UISegmentedControl with UIImageView in Objective-C


1. Under Segmented Control section, Segments default value is ‘2’, you can make it any value as per your requirement (in our case I took ‘3’).
In this blog, let’s create Segmented Control with Image View object. To do so we need to use UISegmentedControl class & UIImageView class respectively. Before proceeding further, lets have a look what is Segment Control and Image View object ?
Segmented Control object is a horizontal control consisting of multiple segments, each segment works as a discrete button. It is mainly used to show/hide data in same view based on selected segment. More…
An Image View object is used to display a single image or sequence of animated images in your interface. More…
Follow below steps to create Segmented Control project using Objective-C Language:
Step 1: Launch Xcode and create new project by clicking on Single View Application template under iOS tab as shown in below image and click Next button.

Step 2: Enter product name as SegmentedControlDemo and select Language as Objective-C then again click on Next button as shown in below image. Later click on Create button to create project on the next pop-up window.

Step 3: Adding Segmented Control & Image View on View Controller
Before adding any object, just go to main.storyboard file available in the project navigator.
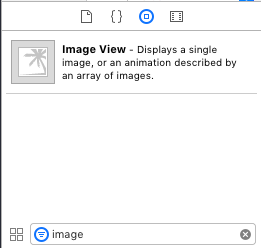
Further, search Segmented Control in Object Library on the right-bottom side and drag & drop that object by pressing Ctrl button and place it on the storyboard.
Now, by selecting Segmented Ctrl from Controller, its properties can be changed from Attribute Inspector from right side as mentioned in below :
2. In Segment option, its default value is ‘Segment 0’ and any segment can be selected from here.
3. In Title option, its default value is ‘First’ but I have changed it to ‘iPhone’ to give title for first segment as shown in below screenshot.

In the same manner, you need to search Image View and place it into the View Controller using drag and drop method.


Step 5: Import images in Assests.xcassets


In the same manner, you need to search Image View and place it into the View Controller using drag and drop method.
Step 4: Setting up properties for those objects
Now, set the property for segmented control (both Outlet & Action) and image view object by using drop & drop method as shown in below screenshots.


Step 5: Import images in Assests.xcassets
You need to import images by using drop & drag method as mentioned in below screenshot.

Step 6: Coding in View Controller
ViewController.h file

In ViewController.h file, only properties of objects are defined which we already did in above steps.
ViewController.m file

segmentCtrl is the IBOutlet property which is used to get its selected index value using selectedSegmentIndex property.
In Segment Control action method, switch case is used where expression is “self.segmentCtrl.selectedSegmentIndex” which returns integer value of last segment touched. On the basis of its returned value, its case will be executed wherein below statement is used to display image.
self.deviceImage.image = [UIImage imagedNamed: @“iPhone”];
self.deviceImage.image = [UIImage imagedNamed: @“iPad”];
self.deviceImage.image = [UIImage imagedNamed: @“iMac”];
In default case, we are simply printing a message ‘Invalid Input’ in console.
In viewDidLoad() method, the above mentioned if condition is used to set its initial value to be displayed when simulator runs.
Step 6: Finally, Run the Simulator
You are Ready with your Segmented Control and Image View. Just Run the program & see result in simulator.

I hope you enjoyed this video. 👍🏻
You can also watch this blog’s video mentioned in below link:
https://www.youtube.com/edit?video_id=bRPkHpPtjLs
https://www.youtube.com/edit?video_id=bRPkHpPtjLs
Thanks for your compliment!
ReplyDeleteThis comment has been removed by the author.
ReplyDelete