AUTO LAYOUT in iOS
In this blog tutorial of Auto Layout (Part-1), we will implement Auto Layout Constraints into our iOS application in Xcode 8.
Auto Layout is basically a concept which is used for laying out the UI elements in your iOS applications. It is used to create adaptive UI when screen size and device orientation changes. The size and position for all views are determined on the basis of constraints. More…
Main Components of Auto Layout are:
- Constraints
- Size Classes
- Trait Collections
Auto layout is a constraint-based layout system. In Constraints, there is two options to set constraints for a particular item - Auto Layout Bar & Control+Drag. So let’s get started to understand by creating new Xcode project.
NOTE: Size Classes & Trait Collections will be discuss in Part-2.
Following are the steps to implement Auto Layout Constraints:
Step 1: Open Xcode -> click on Create New Xcode project then choose Single View Application template under iOS tab as shown in below image and click Next button.

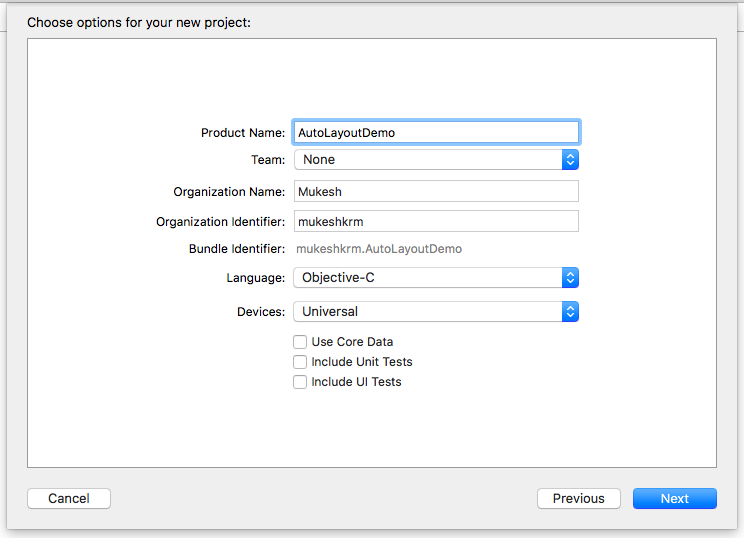
Step 2: Enter the product name as AutoLayoutDemo, select any Language and again click Next button as shown in below image. Later click Create button to create project appear on the next window.
Step 3: Adding UIButton into the View Controller.
On your project, click on main.storyboard file available in the project navigator, then View Controller will be shown where you need to add button by searching from object library, drag into the superview of View Controller, it will look like below.


Now, select button and change its Background color to ‘Blue’ & Text colour to ‘White’ just to look better. (Optional to you)
Step 4: Button Preview in all devices
Select Related Items icon -> Preview -> Main.storyboard (Preview) with pressing option key as shown in below image. Thereafter, preview screen will be appeared on right hand side in split way as shown in next image.


In Preview screen, we can add other devices by pressing ‘+’ button shown at the bottom to preview button as shown in below screenshot.

Now, as it can be seen that button is not at the centre in iPhone 7 Plus & iPhone SE while it is centered only in iPhone 7 because View is selected as iPhone 7 and button placed at its centre.
That’s why we use Auto Layout Constraints. Let’s discuss about the terms and ways of constraints.
Here you actually need to define following terms in constraints:
- Center Horizontally (x-position)
- Center Vertically (y-position)
- Width
- Height
Xcode provides two ways to define auto layout constraints:
- Auto layout bar
- Control-drag
1. Auto Layout bar
First, we begin with the auto layout bar. At the bottom-right corner of the Interface Builder editor, you should find five buttons. These buttons are from the layout bar. You can use them to define various types of layout constraints.

Each button has its own function:
- Update Frames - To update frame when constraints are applied.
- Embed In Stack – Embed views into a stack view. Stack view is a new feature since Xcode 7. We will further discuss about it.
- Align – Create alignment constraints, such as aligning the x-position and y-position of an object.
- Add New Constraints – Create spacing constraints, such as defining the width and height of a UI control.
- Resolve Auto Layout Issues – Resolve layout issues such as update constraints.
Step 5: Applying Constraints to UIButton using Layout Bar
As discussed earlier, to set the button at the centre, you need to define that four constraints: center horizontally and center vertically with its width and height as well. All constraints are with respect to the view.
For applying align constraints, select the UIButton in Interface Builder and then click the Align icon in the layout bar. In the pop-over menu, check both “Horizontal in container” and “Vertically in container” options. Then click the “Add 2 Constraints” button.

After adding above 2 constraints, add constraints for width and height by clicking ‘Adding New Constraints’ from layout bar, check Width & Height & type its desired values then click on “Add 2 Constraints” button.

After applying all 4 constraints, it look as can be seen in below image. Blue line indicates that constraints are applied successfully.
Now, you can again see the preview for the compatibility of its position in all devices.

Step 6: Applying constraints to another UIButton using Ctrl+Drag.
In Ctrl+Drag approach, we have two aspects: Align Constraints & Pin Constraints.
Here Align Constraints aspect is used.
After adding another UIButton, just press Ctrl button and release onto first UIButton (upper button), new pop-up will be display with multiple options as shown in below screenshots.


- Vertical Spacing: distance between both Buttons vertically.
- Leading: distance from left boundary of the view.
- Center Horizontally: to align x position at center of the view.
- Trailing: distance from right boundary of the view.
- Equal Widths: to set width same as existing Button.
- Equal Heights: to set height same as existing Button.
- Aspect Ratio: to control width & height ratio that you set.
Now, here I am using Pin Constraints aspect to set dynamic width/height or spacing between two UI elements / views.
In this case, I am deleting the second UIButton and work with first UIButton. Thereafter, also delete width constraint of existing UIButton from View Controller Scene as shown in screenshot.

For applying pin constraints, select the UIButton in Interface Builder and then click the Add New Constraint icon in the layout bar. In the pop-over menu, click left & right pin and also set its value to ’40’ then click the “Add 2 Constraints” button as shown in screenshot.

Step 7: Run Simulator
Hence you can now check the dynamic size of Button in Portrait as well as Landscape orientation in Simulator.


I hope you enjoyed this Blog tutorial.
Have Fun !
Thanks for the compliment...and more will be shared soon..
ReplyDelete