Crossed Ads

Wednesday, 14 June 2017

How to implement Switch control in Objective-C with Xcode 8 ? (Blog)

Switch control in iOS (Objective-C)


In this tutorial, we will see how to implement Switch control in iOS application using Objective-C Language.

Switch is a control which offers to choose ON/OFF state. To do so, UISwitch class is used to implement switch control into your iOS project. This control is basically used to turn On or Off functionality of a particular task.

Example - Turning ON/OFF WiFi or Airplane Mode or Mobile Data in Settings of your iPhone or iPad.


Following are the steps to implement Switch control:

Step 1: Open Xcode and create new project by clicking on Single View Application template under iOS tab as shown in below image and click Next button.


Step 2: Enter the product name as SwitchDemo, select the Language as Objective-C and again click Next button as shown in below image. Later click Create button to create project appear on the next window. 


Step 3: Adding UISwitch & UILabel into the View Controller.
On your project, click on main.storyboard file available in the project navigator, and then select the UISwitch from object library, drag into the superview of View Controller, it will look like below.  


Moreover, Switch control is by default at ON state. Manually, you can set to OFF from Attribute Inspector by selecting Switch control.

In the same manner, Label will also be placed using drag & drop method into View Controller to show the states of Switch control.

Step 4: Declaring property for Progress View & Label.

Select the Assistant Editor and create IBOutlet & IBAction property for UISwitch control by holding Ctrl button. It will open up a popup view like below then enter the Name as ‘switchButton’ and ‘switchSwipped’ respectively and click Connect.  


Both property (IBOutlet & IBAction) is defined because on action event of Switch control some text should be displayed on condition of its state which will be known using isOn method of switch by calling its outlet property as the same can be seen in below screenshot.

In the same manner, set up the IBOutlet property for Label object & name it as ‘lblStatus’ and then hit ‘Enter’ button.

The all property defined in ViewController.h file will be shown as below: 


Step 5: Complete Code in ViewController.m file
In ViewController.m file, all code will be written in action method of switch control where we check the state of switch control by accessing its name of outlet property using isOn property in if statement. Thereafter, some message will be displayed like “Switch is ON” will be displayed on Label and if that not On then “Switch is OFF” will be displayed on Label. 


That’s the complete code for Switch control program.


Step 6: Finally, Build and Run the application where you will get the output like below. 


Have Fun !


You can also watch its video on below link:


How to implement Switch control in iOS using Objective-C with Xcode 8 (Video)

Tuesday, 13 June 2017

How to implement Progress View in Objective-C with Xcode 8 ?

Progress View in iOS (Objective-C)


In this tutorial, we will see how to implement Progress View in iOS application using Objective-C Language.

Progress View is an object which is used to show progress of a particular task over a time. To do so, UIProgressView class is used into your iOS project. In our project, we used progress view object to progress on click event of button and progress value will be displayed in Label.

Step 1: Open Xcode and create new project by clicking on Single View Application template under iOS tab as shown in below image and click Next button. 


Step 2: Enter the product name as ProgressViewDemo, select the Language as Objective-C and again click Next button as shown in below image. Later click Create button to create project appear on the next window.


Step 3: Adding UIProgressView, UILabel & UIButton onto the View Controller.
On your project, click on main.storyboard file available in the project navigator, and then select the UIPickerView from object library, drag into the superview of View Controller, it will look like below.


Moreover, Progress View object is having its progress default value is 0.5 so make it zero to appear it as initially started.

In the same manner, Label and Button will also be placed into View Controller.


Step 4: Declaring property for Progress View, Label & Button.

Select the Assistant Editor and create IBOutlet property for UIProgressView object by holding Ctrl button. It will open up a popup view like below then enter the Name as ‘progressView’ and click Connect. 


In the same manner, set up the IBOutlet property for Label object & name it as ‘lblText’ and then hit ‘Enter’ button. While set up the IBAction property for Button & name it as ‘btnStart’ and then hit enter button.

Furthermore, we need to define property for NSTimer class through which progress view will get executed over a time.

@property (nonatomic) NSTimer *myTimer;

The all property defined in ViewController.h file will be shown as below: 


Step 5: Complete Code in ViewController.m file
In ViewController.m file, all code will be written in button action method where we schedule time using block which will be triggered after specified interval of time repeatedly if repeats value is set to YES. 


In block, we have taken a variable of type int named count which should be static type which is incremented by 1 on every call. This variable is used to iterate the progress of progress view object and static keyword is used to remember its value across invocation means its value never gets reset.

(The progress property has a value from 0.0 to 1.0. We are updating the value with 0.1 at each call).

When value of count variable reaches to 100, progress bar will be filled up  using if condition and will also show its value in label as well. In else part, timer variable will be invalidated and value initialised to nil.
That’s the complete code for UIProgressView.


Step 6: Finally, Build and Run the application where you will get the output like below. 


Have Fun !


You can also watch its video on below link:

Saturday, 3 June 2017

How to create Segmented Control with Image View in Objective (Xcode 8) ?

How to create Segmented Control with Image View in Objective-C with Xcode 8 ?

UISegmentedControl with UIImageView in Objective-C

In this blog, let’s create Segmented Control with Image View object. To do so  we need to use UISegmentedControl class & UIImageView class respectively. Before proceeding further, lets have a look what is Segment Control and Image View object ?

Segmented Control object is a horizontal control consisting of multiple segments, each segment works as a discrete button. It is mainly used to show/hide data in same view based on selected segment. More…

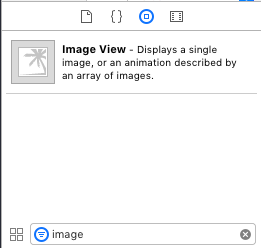
An Image View object is used to display a single image or sequence of animated images in your interface. More…

Follow below steps to create Segmented Control project using Objective-C Language:

Step 1: Launch Xcode and create new project by clicking on Single View Application template under iOS tab as shown in below image and click Next  button.


Step 2: Enter product name as SegmentedControlDemo and select Language as Objective-C then again click on Next button as shown in below image. Later click on Create button to create project on the next pop-up window.


Step 3: Adding Segmented Control & Image View on View Controller
Before adding any object, just go to main.storyboard file available in the project navigator.
Further, search Segmented Control in Object Library on the right-bottom side and drag & drop that object by pressing Ctrl button and place it on the storyboard.  


Now, by selecting Segmented Ctrl from Controller, its properties can be changed from Attribute Inspector from right side as mentioned in below :

1. Under Segmented Control section, Segments default value is ‘2’, you can make it any value as per your requirement (in our case I took ‘3’).

2. In Segment option, its default value is ‘Segment 0’ and any segment can be selected from here.

3. In Title option, its default value is ‘First’ but I have changed it to ‘iPhone’ to give title for first segment as shown in below screenshot.


In the same manner, you need to search Image View and place it into the View Controller using drag and drop method. 


Step 4: Setting up properties for those objects
Now, set the property for segmented control (both Outlet & Action) and image view object by using drop & drop method as shown in below screenshots. 


Step 5: Import images in Assests.xcassets
You need to import images by using drop & drag method as mentioned in below screenshot. 


Step 6: Coding in View Controller

ViewController.h file 


In ViewController.h file, only properties of objects are defined which we already did in above steps.

ViewController.m file 


segmentCtrl is the IBOutlet property which is used to get its selected index value using selectedSegmentIndex property.

In Segment Control action method, switch case is used where expression is “self.segmentCtrl.selectedSegmentIndex” which returns integer value of last segment touched. On the basis of its returned value, its case will be executed wherein below statement is used to display image.

self.deviceImage.image = [UIImage imagedNamed: @“iPhone”];
self.deviceImage.image = [UIImage imagedNamed: @“iPad”];
self.deviceImage.image = [UIImage imagedNamed: @“iMac”];

In default case, we are simply printing a message ‘Invalid Input’ in console.

In viewDidLoad() method, the above mentioned if condition is used to set its initial value to be displayed when simulator runs.

Step 6: Finally, Run the Simulator

You are Ready with your Segmented Control and Image View. Just Run the program & see result in simulator.


I hope you enjoyed this video. 👍🏻

You can also watch this blog’s video mentioned in below link:
https://www.youtube.com/edit?video_id=bRPkHpPtjLs


Thursday, 1 June 2017

How to create Web View with Activity Indicator in Objective-C ?

Web View with Activity Indicator in Objective-C

In this tutorial, we are creating an app of Web View to display web content in your iOS application with Activity Indicator. To do so we need to use UIWebView class and further need to send it a request to load web content. Like Facebook or Twitter app, we have browsing web content in its own app.
An activity indicator is used to show that a task is in progress and it appears as a “gear” that is either spinning or stopped.

Follow below steps to create Web View project using Objective-C Language:

Step 1: Launch Xcode and create new project by clicking on Single View Application template under iOS tab as shown in below image and click Next  button.


Step 2: Enter product name as WebViewDemo and select Language as Objective-C then again click on Next button as shown in below image. Later click on Create button to create project on the next pop-up window.


Step 3: Adding Web View & Activity Indicator on View Controller
Before adding any object, just go to main.storyboard file available in the project navigator. Further, search Web View in Object Library on the right-bottom side and drag & drop that object by pressing Ctrl button and place it on the storyboard.


After placing object on View Controller, set its constraints and pin it from all four sides to zero as seen in below screenshot.


In the same manner, you need to search Activity Indicator and place it into the View Controller using drag and drop method. 


Now, set its constraints also as mentioned in below screenshot.


Change its style and colour from Attribute Inspector as shown in screenshot. 


Step 4: Setting up properties for those objects
Now, set the property for web view object and activity indicator object by using drop & drop method as shown in below screenshots. 


Step 5: Setting up Web View Delegate protocol
Web View needs delegate protocol which is to be added in ViewController.h file as mentioned below.
We also have to set the value to self for UIWebViewDelegate protocol in viewDidLoad() method of ViewController.m file.

ViewController.h file 


ViewController.m file 


UIWebViewDelegate protocol is needed to implement in .m file because its pre-defined methods are required for the functioning of activity indicator object and those methods are as follows:
  1. webViewDidStartLoad()
  2. webViewDidFinishLoad()

In 1st method, this method is invoked when web view started loading web content. During this process, activity indicator should start to animate.

- (void)webViewDidStartLoad:(UIWebView *)webView{
[self.activityIndicator startAnimating];
}

In 2nd method, this is invoked when web view finish loading web content. During this task, activity indicator should stop to animate and also hide when stopped.

- (void)webViewDidStartLoad:(UIWebView *)webView{
[self.activityIndicator stopAnimating];
self.activityIndicator.hidesWhenStopped = YES;
}

Step 6: Finally, Run the Simulator

You are Ready with your Web View and Activity Indicator. Just Run the program & will be seen below result in simulator.


NOTE: Make sure you have internet connection while running this project because url will load web content using internet.

I hope this video tutorial is helpful to you. Enjoy 👍🏻

You can also watch this blog’s video mentioned in below link: